If you can't see the main menu at the top of the page, you can click any of the main menu headings here:
A Sequential Phonics Program - Program Overview - PDF Files - Pictures - Audio - Video - Reading Street - Blog
A Sequential Phonics Program - Program Overview - PDF Files - Pictures - Audio - Video - Reading Street - Blog
Please scroll down to see the skills taught at level two, how level two fits into the Sound City Reading program, the books used at level two, and sample pages with a description telling how to complete each page.
Information About Level 2 - Exploring Sounds In Words
This section explains the skills taught in the Level 2 materials. To see the PDF files for these materials, hover over PDF FILES on the main menu and then click on LEVEL 2 - EXPLORING SOUNDS IN WORDS PDFS.
General Comments
- Level two is a transition level that prepares students to spell and read short vowel words at level three. At level two, students concentrate on understanding how alphabet letters are used to make up words. Using picture pages, students write letters to show beginning and ending sounds in words. The pages are carefully arranged, so that students become familiar with a new beginning sound before they are expected to discriminate between the new sound and other sounds. The same approach is used for the ending sounds. On "Put It Together" pages, included after each set of six new letters has been taught, students develop the following skills, using picture pages. 1) They identify beginning and ending sounds in short vowel words. 2) They identify the middle sound in short vowel words. 3) They identify the beginning, middle, and ending sounds in short vowel words.
- At level two, students continue to work directly with the teacher during each part of the lesson. The teacher provides guidance and support as needed.
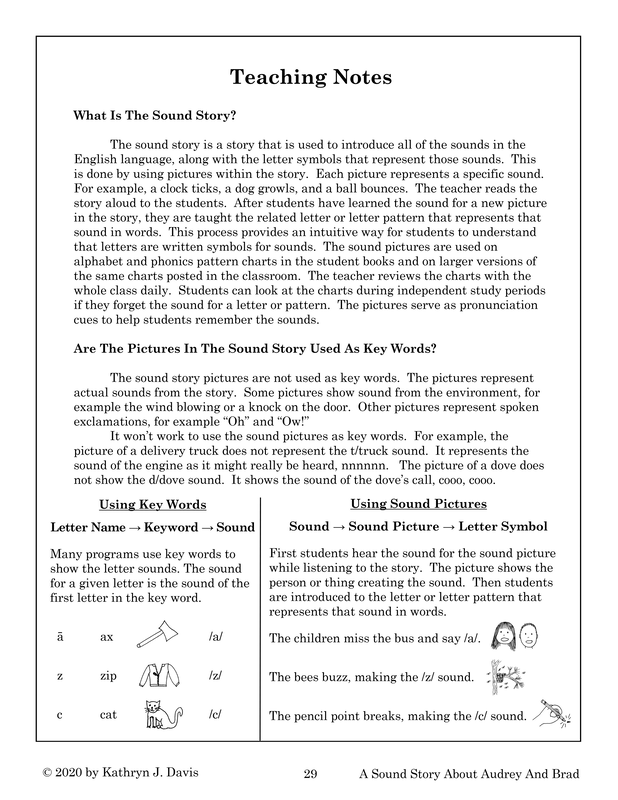
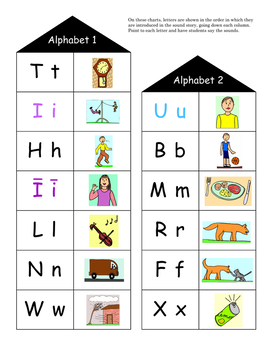
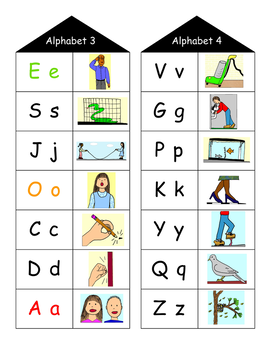
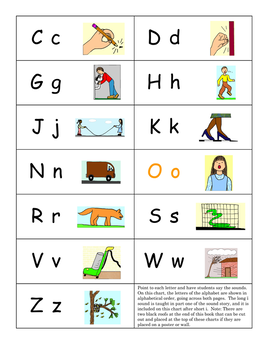
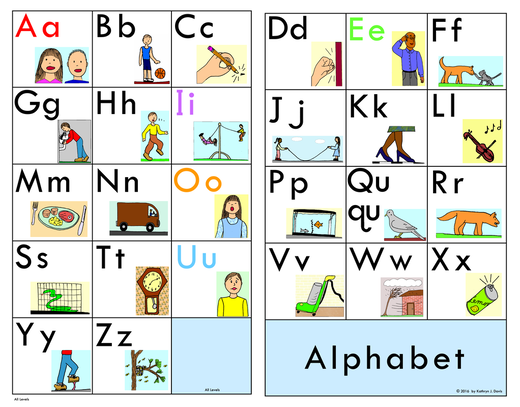
- The alphabet letters taught at level one are reviewed at level two in the same order: t i h l n w u b m r f x e s j o c d a v g p k y qu z. This is the order in which they appear in A Sound Story About Audrey And Brad. The pages in the sound story include twenty-seven sound pictures that show the sounds for the letters of the alphabet. This includes all of the single consonant sounds, five short vowel sounds, and the long ī sound. The letters that are easiest to write are studied first, and letters that are the most difficult to write are studied last. At level two, the teacher rereads one section of the sound story aloud at the beginning of each new unit in the student books. Students then complete a handwriting lesson for that letter, followed by workbook pages that are related to the same letter.
- After tracing letters at level one, students will find it easier to write the letters on their own at level two. Students will now learn how to place each letter capital and lower case letter on handwriting lines. They trace large patterns for each new letter, as they did at level one. They also trace smaller letters (which are a bit smaller than the small letters at level one) and copy them. Review letters are included in each unit so that students will remember how to write them.
- In addition to the written work in their workbooks, students will also write letters during a daily dictation period, so that writing the letters will become automatic. This prepares students to begin spelling words at level three. The teacher pronounces the letter sounds one at a time, and students repeat the sounds as they write the related letters on a sheet of lined handwriting paper. This is a multisensory teaching method - students hear the sound and pronounce it while simultaneously writing the letter. The exercise involves the processing of auditory information, the application of motor skills to write the letter and say the sound, and visual monitoring as the letter is written. Repeated tracing during the earlier introduction of the letters allows students to rely on muscle memory as they write. The teacher circulates throughout the room, providing assistance if a student's letter is formed incorrectly by writing a perfect model with a red pencil for the student to trace.
- Oral blending and segmenting lessons are continued at level two. The first five lessons focus on pictures that have two sounds, using words that are spelled in a variety of ways. For instance, the first lesson has these pictures: ea-t, i-ce, u-p, p-aw, b-ee, i-n, t-ea, and z-oo. (Students do not see or read words during these lessons.) The remaining lessons have pictures with either two or three sounds. The sounds for the pictures in these lessons include only the consonant and short vowel sounds that have been been reintroduced at level two. For example, the sixth lesson shows pictures for these words after the letters t, i, h, l, n, and w have been studied: i-t, i-n, w-i-n, l-i-t, t-i-n, h-i-ll, i-ll, and h-i-t. The students work with the exact letter sounds that they are currently reviewing. From this point on, the remaining oral blending and segmenting exercises use pictures that show short vowel words. These activities will prepare students to read and spell short vowel words. It will also help the students become familiar with each of the pictures and their meanings. This will be helpful because students will see many of the same pictures in their books after they begin level three.
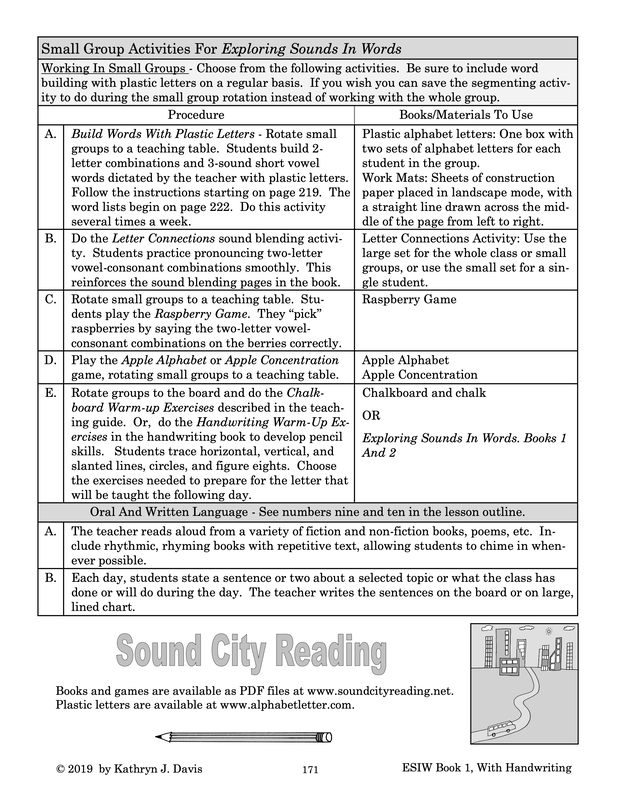
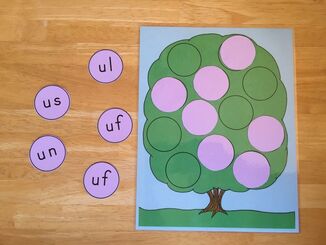
- Students begin spelling words with plastic letters on a work mat after the letter b has been introduced. The lessons are set up so that students use only the letters they have studied at level two to spell the words. Students build real words for the first time, working in rotating small groups with the teacher. They use small plastic letters to show the sounds in each word. The lessons are carefully structured so that students will be successful. To simplify the task for the students, a limited number of letters are used during each lesson. The letters are placed on the top half of the work mat, forming a "letter bank." This makes it easy for students to find the letters they need to spell the words. Students listen as the teacher pronounces each word normally. They then say each sound in the word, one at a time (segmenting the word), and move the related letters to the bottom section of their work mats, going from left to right. Instructions for the teacher are included in the student books. They list exactly which letters to use and which words to spell in each lesson. For the first few weeks, to help students get started with this activity, the teacher begins by pronouncing two-sound units, such as ut, ul, un, ub, and bu, lu, nu, bu, always using a short vowel sound. At the beginning, some students will not yet be able to hear all of the sounds in three sound words, but with the teacher's support, they will be able to hear and place the two-sound combinations correctly. After working with just two sounds for a few lessons, students will develop the ability to hear all of the sounds in three-sound words. Spelling words with plastic letters is an important activity at level two. It allows students begin to understand the phonetic structure of words in an easy way. They will be able to focus on just the sounds and letter symbols in the words, without having to write the letters at the same time. This prepares students for level three, when they will begin writing and reading many of the same words in their level three book and workbook. Click here to read about a web page where you can buy plastic letters to use in this activity at a very reasonable price. (Note: Building words with plastic letters is optional at level one.)
- Although they are building short vowel words with plastic letters, students are not yet expected to read printed words and they are not expected to write words to spell them. These skills are taught at level three. This measured, patient approach is designed so that students will experience success at every level.
- Putting three sounds together to read a word can be surprising difficult for beginning readers. Learning to put two sounds together first will prepare students for this task. At level two, there are pages in the students' workbooks that teach students how to pronounce two-letter sound combinations. Regardless of the vowels' position, the short vowel sound is used for every letter combination. The exercises include vowel-consonant combinations (ab, ac, ad, af) and consonant-vowel combinations (ba, ca, da, fa). This is a new skill at level two. The combinations are called "silly sounds" because they are not real words - they are meaningless. To get started, on the silly sounds page, the teacher points to each pair of letters, going down the columns, and models how to pronounce them. The students repeat in unison. (A set of consonant strips and vowel cards with large letters is available to practice this skill on an easel or on the chalkboard with a class.) The goal is for students to pronounce all of the letter combinations without the teacher's help. Students do a silly sounds page after the first six letters have been studied (t, i, h, l, n, and w), and then do a silly sounds page after very third or fourth letter is studied afterward. The combinations are taught in this order: short i, short u, short u, short e, short o, short a, and short i. The last list has a mixture of all of the short vowel sounds. The silly sounds activity is a speech exercise. Students learn to slide two letter sounds together smoothly, using all the possible vowel-consonant and consonant-vowel combinations. Mastering this skill can be challenging, but it will prepare students to read short vowel words at level three.
- For extra practice pronouncing "silly sounds," the Sound City Reading program has a set of consonant strips with moveable vowel cards that can be used to practice the same skill with individuals or a group. Students can also practice this skill when playing the raspberry game in small groups with the teacher.
- At level two, students continue doing rhyming exercises as they did at level one, using picture pages.
- The teacher continues to read aloud to the students daily from a variety of appropriate children's trade books, obtained separately. The teacher occasionally stops to make comments or ask the students questions about what is happening in the book. This is an important part of the program because students are developing an understanding of oral language as they listen to stories and expository (nonfiction) material read aloud every day. When they begin to read stories for themselves at level four, they will already have a well developed listening vocabulary and an innate understanding of sentence and story structure. These are important skills that prepare students to read with good comprehension. The read-aloud period is also very enjoyable for the students. They will develop strong positive feelings about reading.
How Does Level Two Fit Into The Overall Sound City Reading Program?
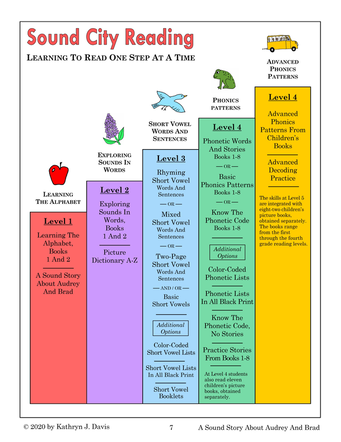
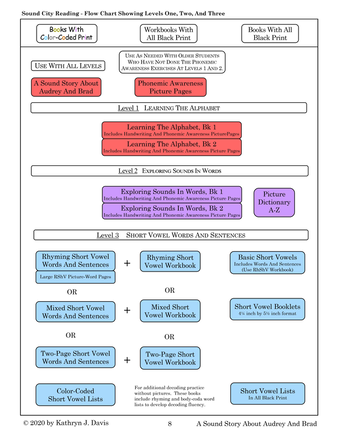
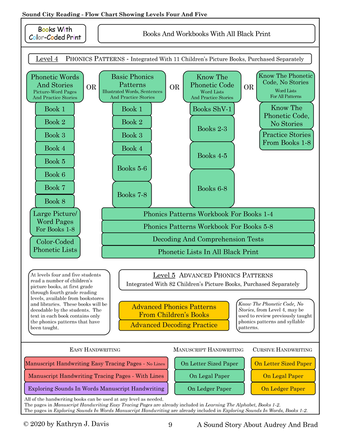
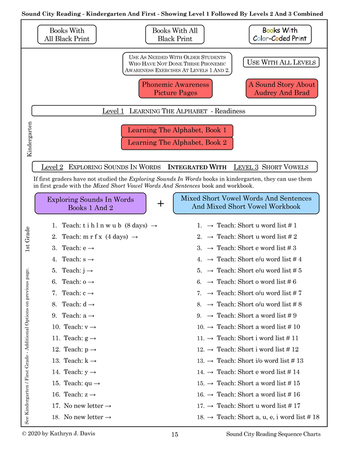
Level two is shown in light purple on the charts. Click on any chart to enlarge it. The books used at each level are listed on the charts.
Level 1 - Red - Learning The Alphabet (Readiness)
Level 2 - Purple - Exploring Sounds In Words (Advanced Readiness)
Level 3 - Blue - Short Vowel Words And Sentences
Level 4 - Green - Phonetic Words And Stories
Level 5 - Golden Yellow - Advanced Phonics Patterns From Children's Books
Level 2 - Purple - Exploring Sounds In Words (Advanced Readiness)
Level 3 - Blue - Short Vowel Words And Sentences
Level 4 - Green - Phonetic Words And Stories
Level 5 - Golden Yellow - Advanced Phonics Patterns From Children's Books
|
Level two can be used in two different ways.
It is not necessary to use the Exploring Sounds In Words books in both kindergarten and first grade. If students in first grade have already completed them in kindergarten, they should use one of the Sound City Reading handwriting books at the beginning of first grade to reintroduce/review the letter formation for all of the alphabet letters.
|
Step Chart - Click to enlarge.
|
Flow Chart - Click on a page to enlarge it.
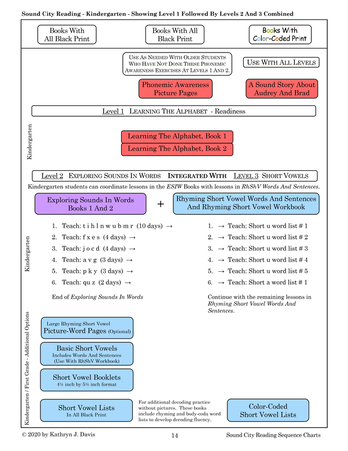
Flow Charts Showing Two Different Ways To Combine Levels Two And Three (Optional)
Click on these pages to enlarge them.
Click on these pages to enlarge them.
What Skills Are Taught At Level Two?
|
Manuscript Handwriting
Letter Dictation From Letter Sounds Letter Recognition Letter / Sound Association Rhyming Awareness Beginning And Ending Sound Awareness Medial Short Vowel Sound Awareness |
Oral Blending - Students listen to separate sounds or syllables and put them together to form a word.
Segmenting - Students listen to a word and say the separate syllables or sounds in the word. Two-Sound Blending - Combining single short vowel sounds with a consonant sound before or after the vowel. Students build two- and three-sound short vowel words with plastic letters. |
Who Should Use Level Two?
Level two can be used with kindergarten or first grade students, or with adults who are English language learners.
- It can be used with kindergarten students after they have completed the Learning The Alphabet books.
- It can be integrated with level three (short vowels) in kindergarten after students have completed the Learning The Alphabet books, if desired.
- If it is not used in kindergarten, it can be used as a readiness program at the beginning of first grade to provide handwriting instruction and a review of phonological awareness skills.
- In first grade, instruction in Exploring Sound In Words can be integrated with the Mixed Short Vowel Words And Sentences book, if desired.
- Level two could be used with adults who are learning to speak English. At level two they can continue learning the alphabet and begin learning how letters work to represent sounds in words.
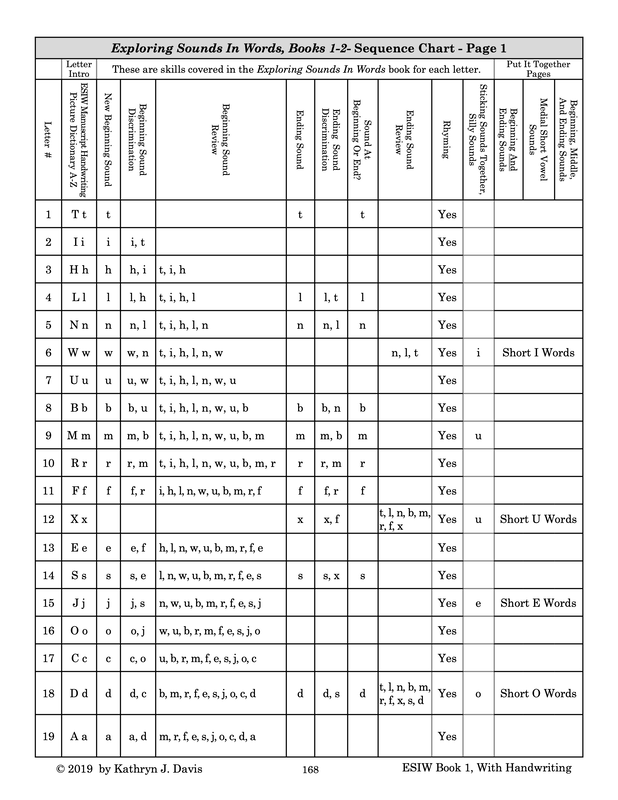
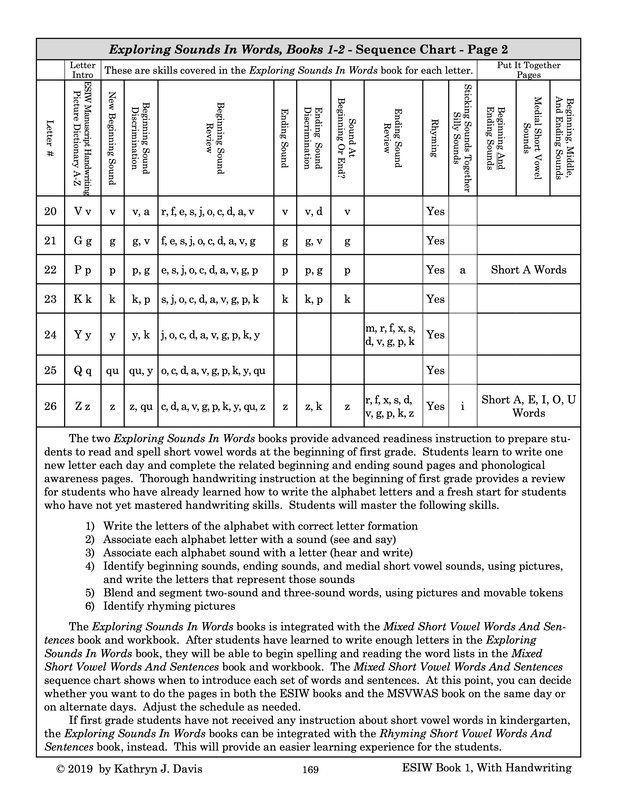
Level Two - Sequence Chart
Click to enlarge either page.
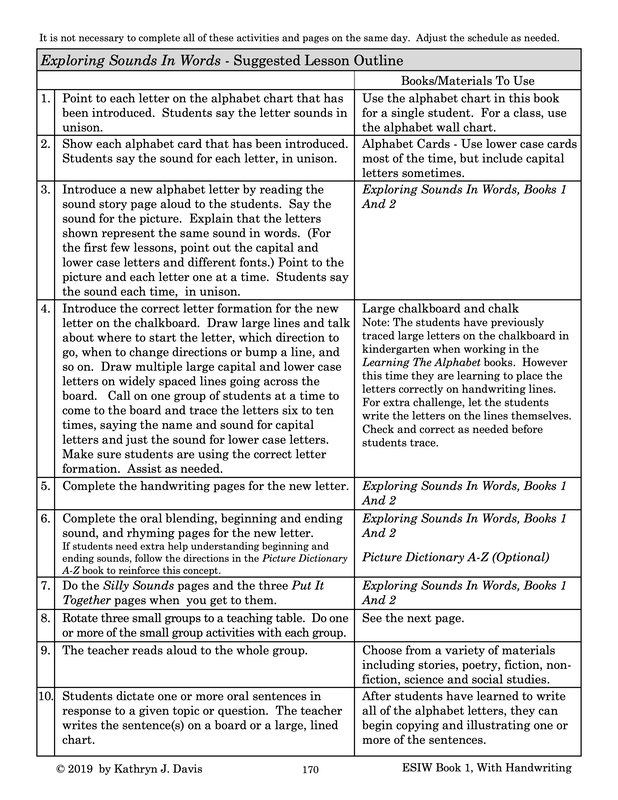
Level 2 - Lesson Outline
Click either page to enlarge it.
Which Books Are Used At Level Two?
The newest Exploring Sounds In Words version consists of two workbooks that include handwriting pages along with the other skill pages. A previous version does not include handwriting pages, so all of the other worksheets fit into just one workbook. A separate Exploring Sounds In Words Manuscript Handwriting book is available to use with this version.
- A sequence chart and lesson outline are included at the end of each book.
- The student pages are to be done in the order in which they appear in the book.
- Instructions for the teacher are printed on each page.
- The teacher should work directly with the students as they complete each worksheet and activity. Students should always have direct guidance from the teacher as needed.
If possible, the teacher should also have a copy of A Sound Story About Audrey And Brad with color pictures to read aloud to the students.
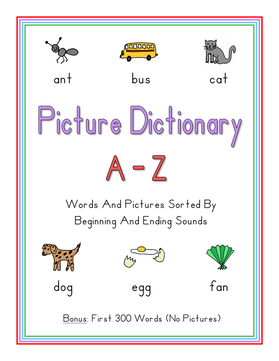
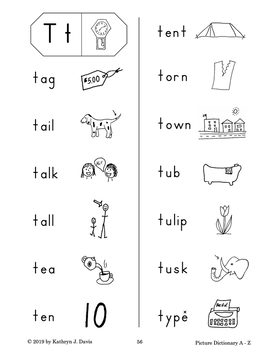
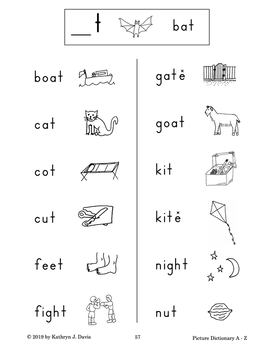
A third book, Picture Dictionary A-Z, is recommended for students who have not done the Learning The Alphabet books first. The picture dictionary book contains illustrated word lists with words that all begin or end with the same sound. There is a different beginning sound word list for each letter of the alphabet (except the letter x). Ending sound word lists are included for any letters that commonly appear at the end of words. Students at level two are not expected to read the words on these lists. The lists are used to point out to the students that the first letter in each word represents the first sound in that word and the last letter in a word represents the last sound.
The PDF files for any of the level two books described here can be found under the PDF FILES menu heading. To open the page with PDF files for level two, click here.
Scroll down to see more information about books used at level two.
Exploring Sounds In Words With Handwriting
|
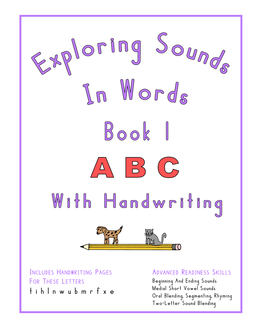
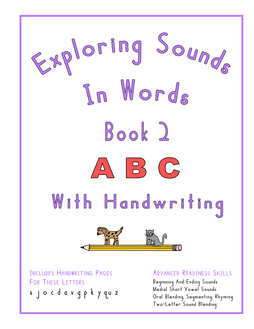
This is the newest version of Exploring Sounds In Words, uploaded in November, 2019. There are two workbooks. Each book has handwriting warm-up pages, large sound story pages, handwriting pages with very large, large, and small letters, and beginning sound pages for each new letter. Ending sound pages are included with letters that commonly appear at the end of words. After each set of six new letters have been introduced, an ending sound review page is included, along with a "silly sounds" page and three different "put it together pages."
|
The silly sounds pages and put it together pages prepare students to begin reading and spelling short vowel words.
These books are at the advanced readiness level. They will work well near the end of kindergarten or at the beginning of first grade to teach/review the alphabet letters, their sounds, and their letter formation. Students write letters to show beginning and ending sounds for pictures. Students learn to pronounce two-sound combinations, such as ab, ac, ad, af, ag, and ba, ca, da, fa, ga, called "silly sounds." Students will also begin spelling short vowel words with plastic letters.
To work in these books, students must be able to recognize each alphabet letter, give its sound, and write it neatly after it has been introduced in the Exploring Sounds In Words books. If not able to do so, students should work in Learning The Alphabet, Books 1 And 2. Both sets of books teach the alphabet letters in the same sequence.
Exploring Sounds In Words (No Handwriting) To Be Used With A Separate Handwriting Book
|
This version of Exploring Sounds In Words contains all of the same pages except the handwriting pages. Because handwriting is not included, all of the other pages fit into one book.
A separate handwriting book is available to use with this version of Exploring Sounds In Words. The pages in this book are the same format as the handwriting pages found in the combined books.
|
A Sound Story About Audrey And Brad
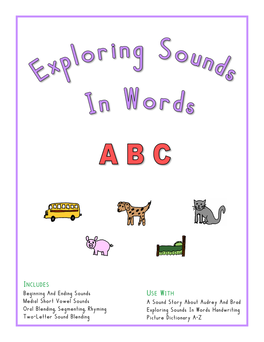
Although the sound story pages are included in the Exploring Sounds In Words books, the teacher may want to use A Sound Story About Audrey And Brad to introduce the sound story sections to the class because it includes large color pictures with the story. It also includes letter-sized sound charts that can be removed from the book and posted on the wall or a bulletin board. These posters are not large enough to see from a distance, but they would work well when working with small groups who are sitting close to them. Many of the charts are from part two of the sound story. They won't be used until level four.
Picture Dictionary A-Z
The Picture Dictionary A-Z book can be used at level two if desired to reinforce beginning and ending sounds in words. The pages are similar to the pages in the Learning The Alphabet books that show word lists that all begin or end with the same letter. A small picture illustrates each word. Students are not expected to read the words on the lists. The teacher reads the words for the students. The students look at the first or last letter in each word to see the letter that shows the beginning or ending sound. This helps students to become familiar with the concept that individual letters show the beginning and ending sounds in words. Student can see that the beginning sound letters are placed first in the word, and the ending sound letters are placed at last in the word, going from left to right.
The newest version of this book also contains letters and letter patterns from part two of the sound story, which makes it useful at level four.
Other Materials Used At Level Two
Sample Pages For The Letter Bb - From Exploring Sounds In Words, Book 1
Click on any sample page to enlarge it.
Each unit in the Exploring Sounds In Words books provides handwriting and phonological awareness instruction for a new alphabet letter. The letters are introduced in the same order as they appear in A Sound Story About Audrey And Brad : t, i, h, l, n, w, u, b, m, r, f, x, e, s, j, o, c, d, a, v, g, p, k, y, qu, and z. Letters that are easy to write are taught first. Letters that are less common or more difficult to write are taught later. The instructional sequence is the same for each new letter. Some letters have both beginning and ending sound pages. Some letters do not commonly appear at the end of words, so they do not have ending sound pages.
Handwriting Warmup Page
|
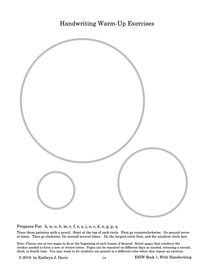
A variety of handwriting warmup exercises are included at the beginning of each Exploring Sounds In Words book. To do the exercises, students trace the shapes and designs on the page repeatedly. There is a list of letters at the bottom of each page showing which letters have the strokes that are practiced on that page. The teacher can decide which pages to do and when to do them. It is recommended that students do one page before learning to write each new letter. Choose a page that provides practice drawing one or more strokes that are used when writing the new letter.
|
Sound Story Page
|
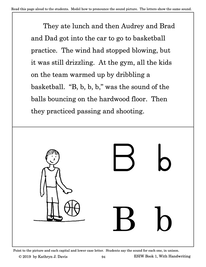
The first page for each new letter is a page from A Sound Story About Audrey And Brad. The teacher reads this page aloud to the students. Each section of the story introduces a sound with a related picture that represents that sound. The capital and lower case letters that represent the sound are shown with the picture. For example, a picture of a ball bouncing off the floor shows the /b/ sound. The letter B b represents the same sound in words.
|
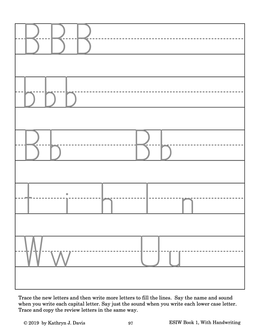
Handwriting 1 - Tracing Large Capital And Lowercase Letters
|
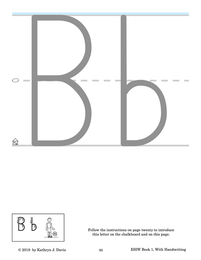
When learning to write a new letter, students trace the large capital and lower case letters many times.
Students say the name and sound each time they trace a capital letter, "Capital B, /b/." Naming the capital letters helps students remember them when they need to use a capital letter at the beginning of a sentence or proper noun.
Students say just the sound when they trace lowercase letters, "/b/." They do not say the letter name. This is important, because students will use only the letter sounds when spelling and reading words. Saying the letter name with the sound causes confusion and disrupts the spelling and decoding process.
The teacher walks around the room and observes the students carefully. If a student is forming a letter incorrectly, the teacher models and assists as needed.
|
Handwriting 2 - Tracing And Copying The New Capital And Lowercase Letters
|
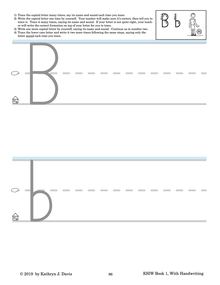
Next students trace large letter patterns for the capital and lower case letters again. This time students will copy each letter two times after tracing it. If a student copies a letter poorly, the teacher writes a perfect letter model directly over the incorrect letter, using a red crayon. The student then traces the teacher's model repeatedly. Students continue to vocalize each time they trace or write the letter, as described above.
|
Handwriting 3 - Tracing And Copying Smaller Letters, Including New And Review Letters
|
Students trace and copy the new capital and lower case letter on smaller lines, vocalizing as described for each letter.
They also trace and copy the letters that have been most recently taught in the same way.
The teacher walks around the room to observe the students as they work. If a letter is formed incorrectly, the teacher writes a perfect model directly over the incorrect letter with a red colored pencil. The student traces the teacher's model several times while vocalizing as usual, and then goes on to the next letter.
|
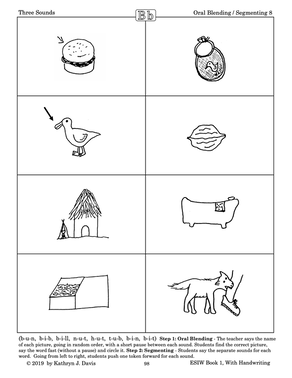
Oral Blending And Segmenting Page
|
On this page students work with the teacher to do an oral blending exercise. The teacher pronounces the individual sounds for one picture at a time, pausing briefly between each sound, going in random order. Students must listen to the sounds, put them together mentally to form a word, and find the matching picture.
In the first five lessons (t, i, h, l, and n) this exercise uses pictures of two-sound words. Examples include ea-t, i-ce, u-p, and p-aw. Working with two sounds is easier for beginners.
In the remaining lessons, this exercise uses pictures of either two-sound or three-sound words. Examples include i-t, i-n, w-i-n, l-i-t, and h-i-ll. All of the words are short vowel words that contain only the letters that have been taught.
|
Oral blending exercises prepare students to read words phonetically.
This page is used again during small group rotations. This time students do a segmenting exercise. The teacher says the name for each picture normally. The students must break the word apart by pronouncing its individual sounds, pausing briefly between each sound. A page with two-sound and three-sound segmenting frames is included in the student book. It can be removed and used by the students during the segmenting exercises. Students place a small token, such as a disk or cube, onto each square on the frame. As they say each sound they push a token into the upper area, going from left to right. Students continue in the same way for each of the picture words.
Segmenting exercises prepare students to spell words phonetically.
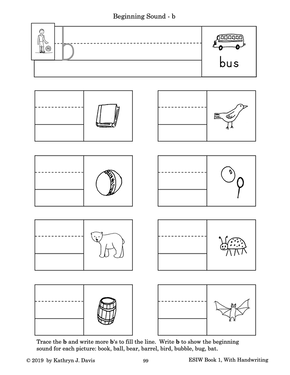
Beginning Sound Page For The New Letter
|
On this page, students start by saying the sound for the new lowercase letter while they trace and copy it several times to fill the rest of the top line.
The teacher and students work together to name each picture and listen for the beginning sound. The beginning sound for every picture is the same - the /b/ sound.
For each picture, students repeat the word and say the beginning sound while writing the letter.
This exercise gives students practice identifying the beginning /b/ sound in spoken words. It also gives them practice writing the new lower case letter b. Both of these skills will prepare them to spell words.
|
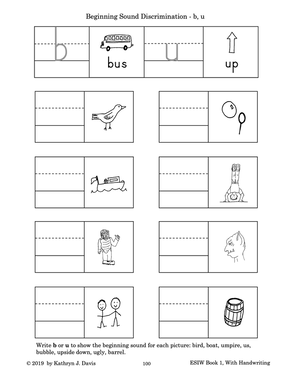
Beginning Sound Discrimination Page - Using The New Letter And The Previous Letter
|
The teacher guides the students as they work as a group to complete each item on the page, assisting as needed.
Students begin by saying the word bus. Then they trace the letter b while saying its sound. Students are not expected to read the word bus, but should notice that it begins with the letter b.
Next students say the word up and trace the letter u while saying its sound. They are not expected to read the word up but they should notice that it begins with the letter u.
For the rest of the page, students say the word for each picture, listen for the beginning sound, and write the letter that shows the correct sound. The beginning sound will be either /b/ or /u/.
|
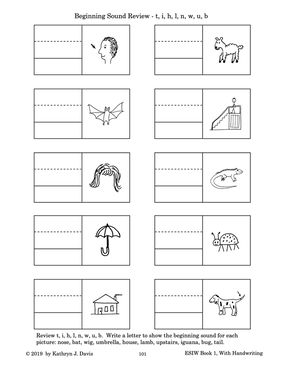
Beginning Sound Review - Using The New Letter And Previous Letters
|
The teacher works with the students to identify each picture, listen for the beginning sound, and write the letter that represents that sound, providing assistance as needed.
This exercise also works well as a handwriting review. As they write each answer, students must remember how to form the letters correctly.
|
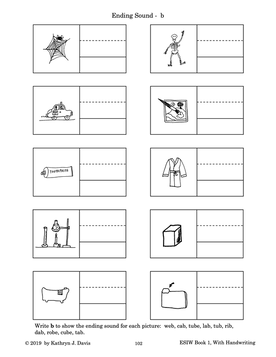
Ending Sound Awareness
|
The teacher works with the students to identify each picture, listen for the ending sound /b/, and write the letter b to show the ending sound. Every picture ends with the same sound. Students find it more difficult to hear ending sounds compared to beginning sounds. Students will do a page like this for each letter that they learn. The repetition provides enough practice for students to master this skill for every letter that is used at the end of words.
|
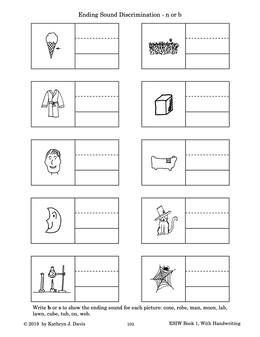
Ending Sound Discrimination - For The New Letter And The Previous Letter
|
On this page, students must listen carefully to each word to identify the ending sound. The will write the letter to show the ending sound for each picture. The teacher helps the students identify each picture and provides assistance as needed to identify the correct ending sound.
The picture words on this page end with either the newest letter taught or the previous letter taught. In some cases, the previous letter is not used at the end of words. The lesson will use the most recent previous letter that comes at the end of words.
|
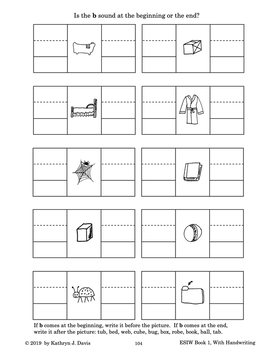
Ending Sound Discrimination - Is The New Letter Sound At The Beginning Or The End?
|
On this page, blank spaces are provided before and after each picture. Students must listen to the word and decide if the new letter comes at the beginning or end of the word. If it comes at the beginning, students write it on the left side of the picture. If it comes at the end, students write it on the right side of the picture.
The teacher helps the students identify the name for each picture and provides support as needed.
|
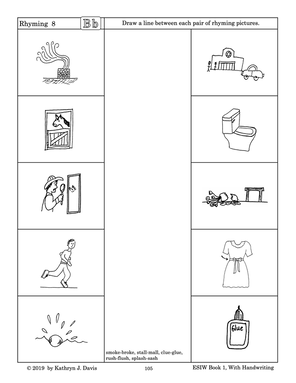
Rhyming Exercise
|
The teacher helps the students identify each picture, and guides the students as they complete the page. Students must choose pictures that end in the same way. They will draw a line from the left column to the right column to connect each pair of rhyming pictures.
If students are not able to recognize which words rhyme, the teacher can follow this procedure.
|
Pages That Appear After Six New Letters Have Been Taught
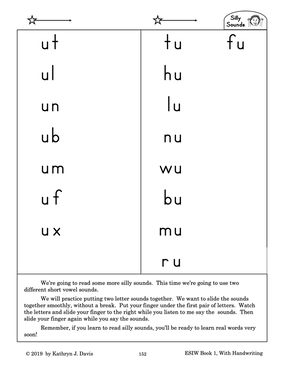
"Silly Sounds" - Putting Two Letter Sounds Together
|
Before students begin reading three-sound short vowel words, it is enormously helpful for them to start by pronouncing two-sound letter combinations. They will read two kinds of combinations - those that start with a vowel and those that end with a vowel. Regardless of the configuration, student will use the short vowel sound for every letter combination.
This activity can be surprisingly difficult for students when they are just getting started. Model how to pronounce each letter combination and have student repeat it in unison, going down the columns on the left side and then the right side. After practicing many times in this way over a period of time, see if the students can pronounce the combinations without your help.
|
These letter combinations are called "silly sounds" because, unlike words, they don't have any meaning. Regular practice will prepare students to be successful when they begin reading three-sound short vowel words at level three.
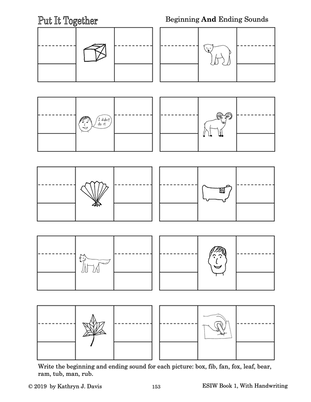
"Put It Together" Page 1 - Writing Beginning And Ending Sounds
|
On this page students say each word and listen carefully to the beginning and ending sounds. They write the beginning sound on the left side of the picture and write the ending sound on the right side of the picture.
The teacher works with the students to name each picture and helps them identify the beginning and ending sounds as needed.
|
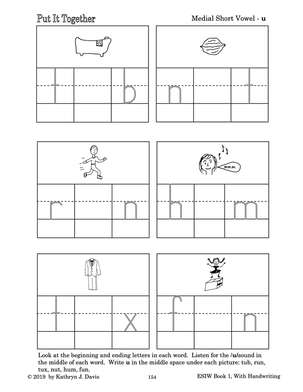
"Put It Together" Page 2 - Writing The Medial Short Vowel Sound
|
This page is more challenging because students must identify the medial vowel sound in these words. To make it easier, for most of these pages the vowel sound will be the same in every word. However, the last page like this, done after the letter z has been introduced, will have a variety of different short vowel sounds.
On these pages, the teacher should identify each picture and model how to stretch out the word when it is pronounced so that students can hear the middle vowel sound. Provide guidance to the students as needed as they complete each section.
|
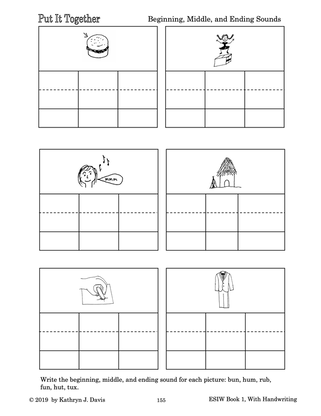
"Put It Together" Page 3 - Writing The Beginning, Middle, And Ending Sounds
|
This is the most challenging of the three "Put It Together" pages. Students must listen carefully to each word and write the beginning, middle, and ending sound, going from left to right under the picture.
The teacher should work with the students to identify the sounds for each picture as they complete the page together.
This exercise prepares students to begin spelling short vowel words at level three.
|
Teacher Preparation
If you have taught level one to one or more students, you will have already done a number of these steps.
Practice The Letter Sounds - Pronouncing the letter sounds accurately will prepare students to spell and read words. To prepare to teach the students, teachers should listen to the sound story and the sounds for the letters of the alphabet on this site. Look under the audio and video headings on the menu to find the recordings. As you listen, practice saying the sounds.
It is important to pronounce the consonant letters without an added "uh" sound. For example, say /t/, not /tuh/. (Slash marks on each side of a letter or letter pattern indicate that you should say the sound, not the letter name.)
The pronunciations for w and qu may be different from what you have heard previously. In this program, w and qu are pronounced in a certain way so that when they are combined with other letters to form a word, the word will be pronounced correctly when it is read phonetically.
Choose The Books You Will Use At Level Two
- You can use Exploring Sounds In Words, Books 1 And 2 that contain handwriting pages, or you can choose the older single volume Exploring Sounds In Words book and use it with the separate Exploring Sounds In Words Manuscript Handwriting book.
- The Picture Dictionary A-Z book can be used if desired. It is not required.
- If you don't already have a full sized copy of A Sound Story About Audrey And Brad, it would be useful at level two, but not required.
You will need to print the materials at home, at school, or at a print shop. See the printing advice
Study The Information For The Teacher In The Student Books Used At Level Two - Study the sequence chart, lesson outline, and other instructions found at the end of the student books.
Prepare The Learning Games - Look at the PDF files for the various games and activities listed below. Print and assemble the games and activities you want to use at level two so that they will be ready to use with the students during small group rotations. You can also continue to use any of the listed games from level one if you wish. The games are available as PDF downloads. These games are very simple to play but they can create a high level of interest in the students. They are especially helpful with reluctant learners.
|
Games And Activities To Use At Level 2
Raspberry Game (ub, uc, ud, uf) Blueberry Game (bu, cu, du, fu) Letter Connections Activity For ESIW - Large Large Beginning Sound Picture Cards (Optional) Beginning Sounds Folder Game - TIHL Order Beginning Sound Folder Game - ABD Order |
Games Used At Level 1
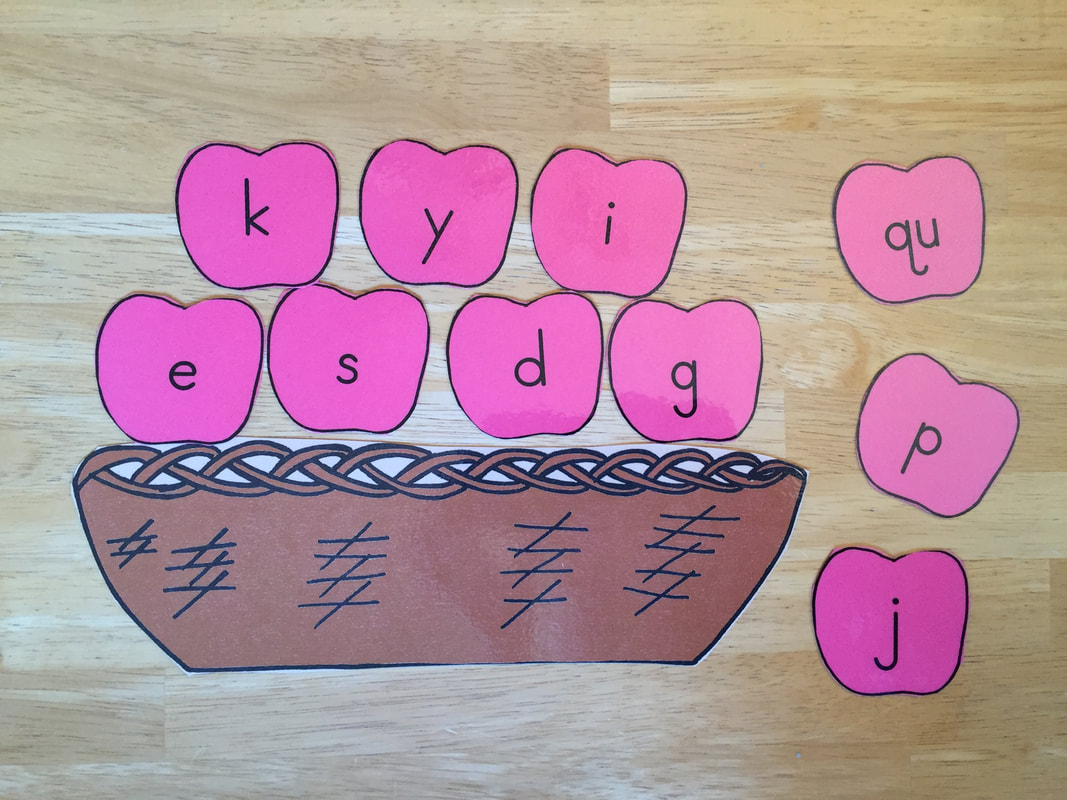
Apple Alphabet Game - Sequential Apple Alphabet Game - All Letters Apple Concentration Game |
Obtain Plastic Letters And Prepare Work Mats - Order enough small plastic letters to use with the games and activities that will be used with the students during small group rotations. They will be used with some of the games and they will be needed in a teacher led activity that helps students recognize the letters when given their sounds. How many you order will depend on how many students you will be working with at one time in the small group activities. Letters that are perfect to use with the level one materials are available from alphabetletter.com at a very reasonable price. You will also need to prepare work mats for the students by drawing a horizontal line across sheets of construction paper (placed in landscape position) to divide them into two equal sections. The number of work mats you need will depend on the size of your small groups. (Note: This activity is optional at level one. If you already have plastic letters and work mats that you used as level one, you will continue to use them.)
Prepare Flashcards - You will need these sets of flashcards. If you used them at level one, use the same cards at level two.
- Lower case letters
- Capital letters
- Sound picture cards from part one of the sound story.
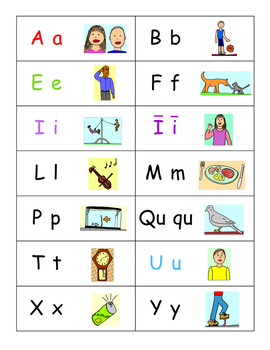
- Cards that show both the alphabet letters and related sound pictures on the same card (Optional at level two.)
Obtain Children's Picture Books - These can be purchased new or used, or they can be checked out of the library on a rotating basis. The teacher will read these books aloud to the students to develop listening comprehension skills and and an interest in reading. Note: If you already have books that you obtained for level one, you can continue to use them. However, adding additional books to read aloud will create a positive effect for the students.
Why Are Letter Sounds Emphasized More Than Letter Names In This Program?
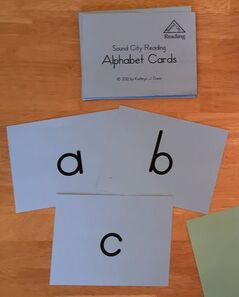
Students learn both the letter names and the letter sounds in this program. However the letter sounds are emphasized in the daily activities. Students say the letter sounds, not the letter names, from the alphabet chart and alphabet cards as a review each day. Why is it so important for students to say just the letter sounds during these review periods and throughout each day's lesson?
- It Helps Students Read Phonetic Words - When students begin to read words, they will say the sound for each letter in the word, going from left to right, to pronounce the word. This process is called decoding. When students look at each letter, the sound must come to mind immediately and automatically instead of the letter name. If students practice saying the letter names from the alphabet chart and alphabet cards, they will think of the letter name for each letter when they begin reading words. Saying the letter names does not form the correct pronunciation of the word. For example, to pronounce or read the word cat, the student should say /c/ /a/ /t/, putting the letter sounds together smoothly. (Letters between slash marks indicate the letter sounds.) If the student sees the word cat and says "cee-ay-tee" that does not sound like the word cat. By saying the letter sounds, students are able to read words phonetically. Eventually they will be able to read thousands of words in this way, even if they have never seen the words before. On the other hand, if students think of the letter names when they read, they will be learning the words by rote memory, making the reading process much more difficult.
- It Helps Students Spell Phonetic Words - At level two, students will learn to write the letters of the alphabet on lined handwriting paper. During a daily dictation period, students will write each letter when give the sound by the teacher. Students will repeat the letter sound as they write each letter. This prepares students to spell phonetic words. When students learn to spell words in this program at level three, they will say each sound in the word, one at at time, while writing the letters (or letter patterns) that represent those sounds, going in order from left to right. The way that the word is pronounced provides the information the student needs to spell the word.
- It Streamlines The Process Of Reading And Spelling Words, Which Is Essential For Many Students - If students are taught to say both the letter name and sound when they study/review the alphabet letters, they will have to screen out the letter names when they read or spell words. This creates a multi-step process. Students see a letter, think of its name and sound, remove the letter name mentally, and say the letter sound. Some students are able to do this comfortably. Other students find it almost impossible to do this type of mental screening, creating a severe roadblock when learning to read and write.

