If you can't see the main menu at the top of the page, you can click any of the main menu headings here:
A Sequential Phonics Program - Program Overview - PDF Files - Pictures - Audio - Video - Reading Street - Blog
A Sequential Phonics Program - Program Overview - PDF Files - Pictures - Audio - Video - Reading Street - Blog
How To Present The Picture-Word Pages
Use This Procedure With
Scroll down to hear a sample picture-word page lesson.
What Are Picture-Word Pages?
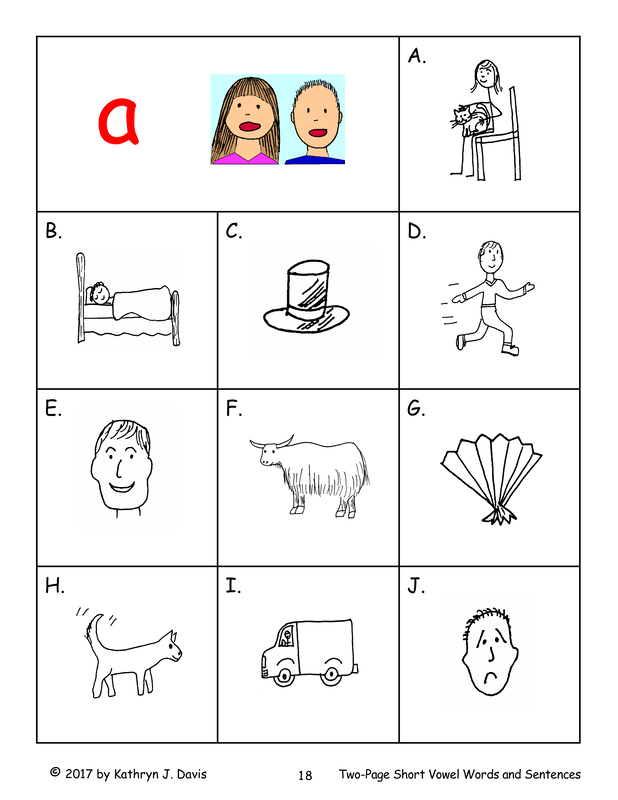
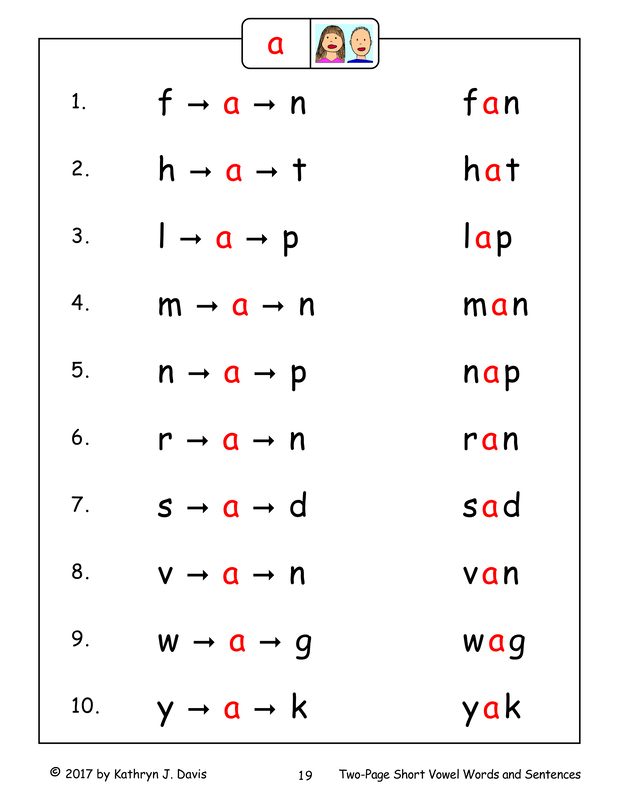
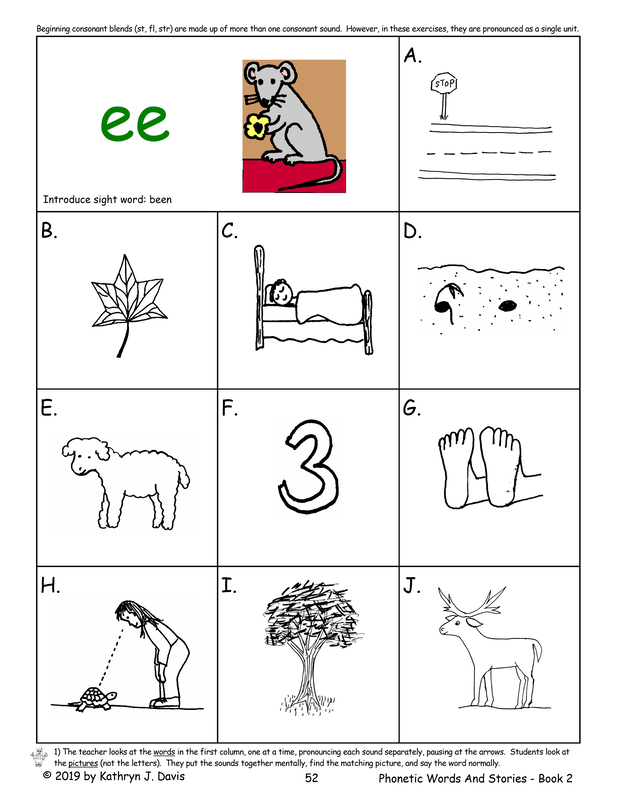
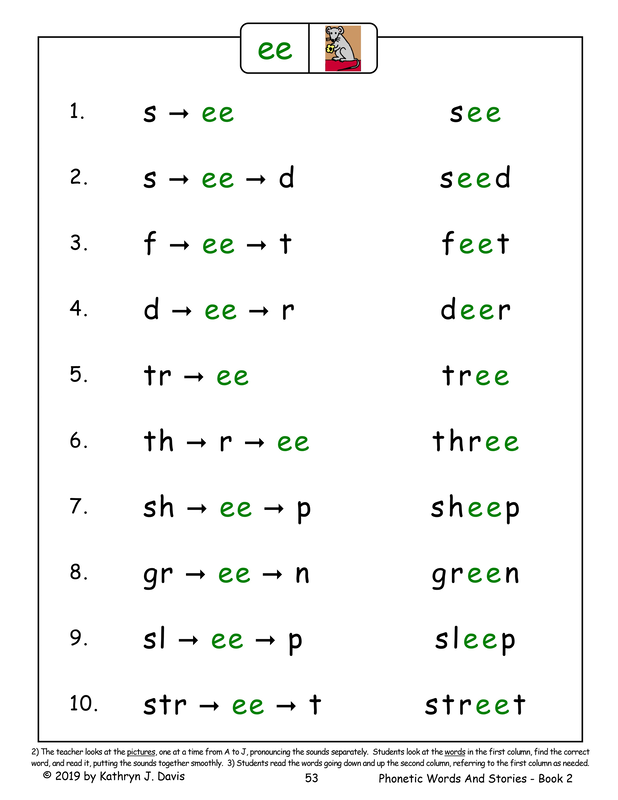
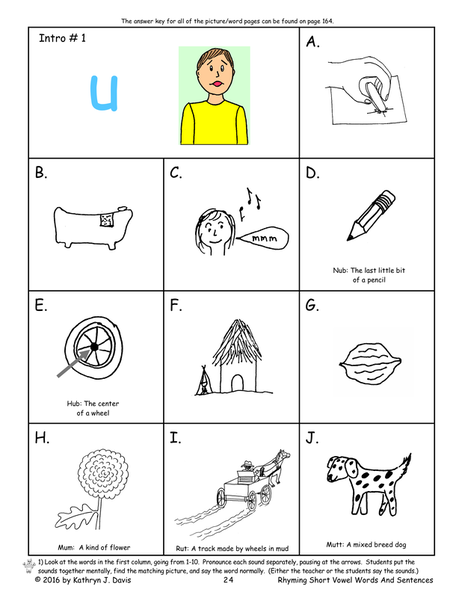
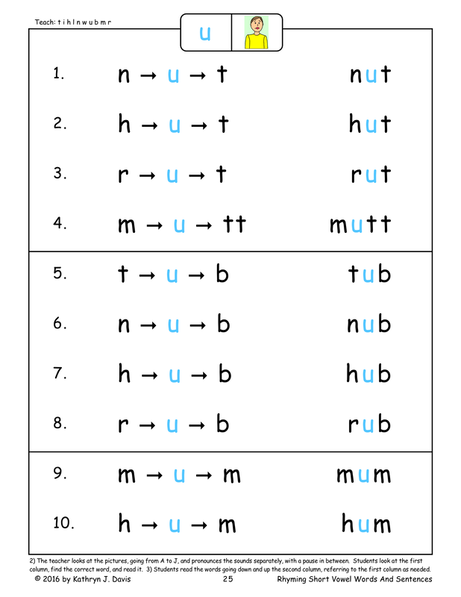
The picture-word pages are facing pages with pictures on the left page and words on the right page. The pictures are not arranged in the same order as the words. The pages are used to teach one new set of ten phonetic words each day. In the short vowel books, all of the words will have a short vowel sound. In the Phonetic Words And Stories books, each list will teach a new phonetic pattern. All of the words on the list will have the same pattern.
How Are The Picture-Word Pages Used?
Picture-word pages are taught in three steps, with an option for a fourth step. The first two steps of the teaching sequence are oral blending exercises. The procedure for teaching the picture-word pages prepares students to be able to read the words fluently by the end of the lesson. These lessons can be done with a full class or with individual students.
Follow These Steps For Each Set Of Picture-Word Pages
You can follow these steps with any of the picture-word pages that introduce short vowel words, words that contain phonetic patterns, or multi-syllable words. You can listen to a sample lesson below.
- Step One - Students Find The Pictures - This is an oral blending activity. The teacher looks at the words. The students look at the pictures. The teacher pronounces each sound in the first word separately, with a slight pause between each sound. The students listen to the sounds and put them together mentally to try to figure out the word. The teacher calls on a student to point to the correct picture and pronounce the word normally, without stopping between the sounds. The teacher and students continue in the same way with the remaining words. The teacher goes down the word list going in order from one to ten.
- Step Two - Students Find The Words - This is another oral blending activity. This time the teacher looks at the pictures. The students look at the words in the first column. The teacher pronounces each sound in the name of the first picture separately, with a slight pause between each sound. The students listen to the sounds and put them together mentally to form a word. This time they must find the word that has letters that match the sounds pronounced by the teacher. The teacher calls on a student to point to the correct word and read it aloud. The student should say the word normally, without a break between the sounds.
- Step Three - Students Read The Words - This is a decoding activity. In the decoding process, students say the letter sounds from left to right in each word, putting the sounds together smoothly to pronounce the word. For this part of the lesson students look at the words in the second column. The teacher calls on students one at a time to read a word going down the column. If a student gets stuck on a word, he or she should go to the same word in the first column and pronounce each letter sound going from left to right, following the arrows, putting the sounds together smoothly. Then the student should go back to the second column and read the word normally. When all the words have been read by individual students, the whole class will read the words again, going down and back up the second column in unison as the teacher points to them.
- Optional Step Four - Questions And Answers - This is a language activity. The teacher calls on individual students to answer questions in a guessing game related to the current set of words. The teacher asks a question about each new word, going in random order. The selected student looks at all of the words, finds the word that answers the question correctly, and reads it aloud. Sample questions might include the following when working with words that have the sh pattern. Provide extra clues and assistance as needed.
What can we use to pay for something that we buy? Cash
What is a living creature that lives in the water? A fish.
Where would you go to buy something to wear? A shop.
When you are working with words that have ending consonant blends (as in fast, lamp, hand), say each sound of the ending blend separately: f-a-s-t, j-u-m-p, h-e-l-p. The teacher will introduce ending consonant blends and students will practice building them with plastic letters and pronouncing them from a sound chart before studying words with ending blends.
When you are working with words that have beginning blends, say the beginning blend as a single unit: cl-a-p, dr-u-m, sp-o-t. In my experience this option works best for the students. The teacher will introduce beginning consonant blends and students will practice building them with plastic letters and pronouncing them from a sound chart before studying words with beginning blends.
When you are working with two-syllable words, you will say each syllable, instead of each individual sound: muf-fin, but-ton, cab-in, pet-al, ba-by, pan-cake, con-nect, as-tro-naut, re-act, ze-ro, to-fu.
Sample Lesson - Short U Words
The lesson below is taught from the Rhyming Short Vowel Words And Sentences book. The students are studying short u words. You can follow these steps with any of the picture-word pages that introduce short vowel words, words that contain phonetic patterns, or multi-syllable words.

